Preamble
SSL certificates are valid for one year. This means that if you want to keep them active annually, you need to renew them and install them on your domain. With us the process is extremely simple, in fact in just a few clicks you can either renew the invoice, or recreate the new certificate and install it on your website.
Invoice payment
As with any of our other services, a renewal proforma is sent via email 30 days before its expiry. On this proforma you have all the information necessary to proceed with the payment for the renewal of the service. Alternatively, by logging into your client area, you can renew your SSL certificates at any time (like all other services). Freely.
As we said the SSL certificate has a nominal duration of 12 months. However, the standard procedure (shared among all the certification authorities) requires to prepare the administrative expiration of the certificate 1 month earlier than its nominal deadline. This is done to allow technicians to do all the necessary operations (eg updating on the servers where it is used, etc.) without incurring in periods of disruption.
Certificate Renewal
Once the SSL certificate invoice has been paid, our system automatically prepares the certificate to be eligible for renewal. Entering then in your customer area under My Services in the certificate sheet you will find it now in Pending Verification status:
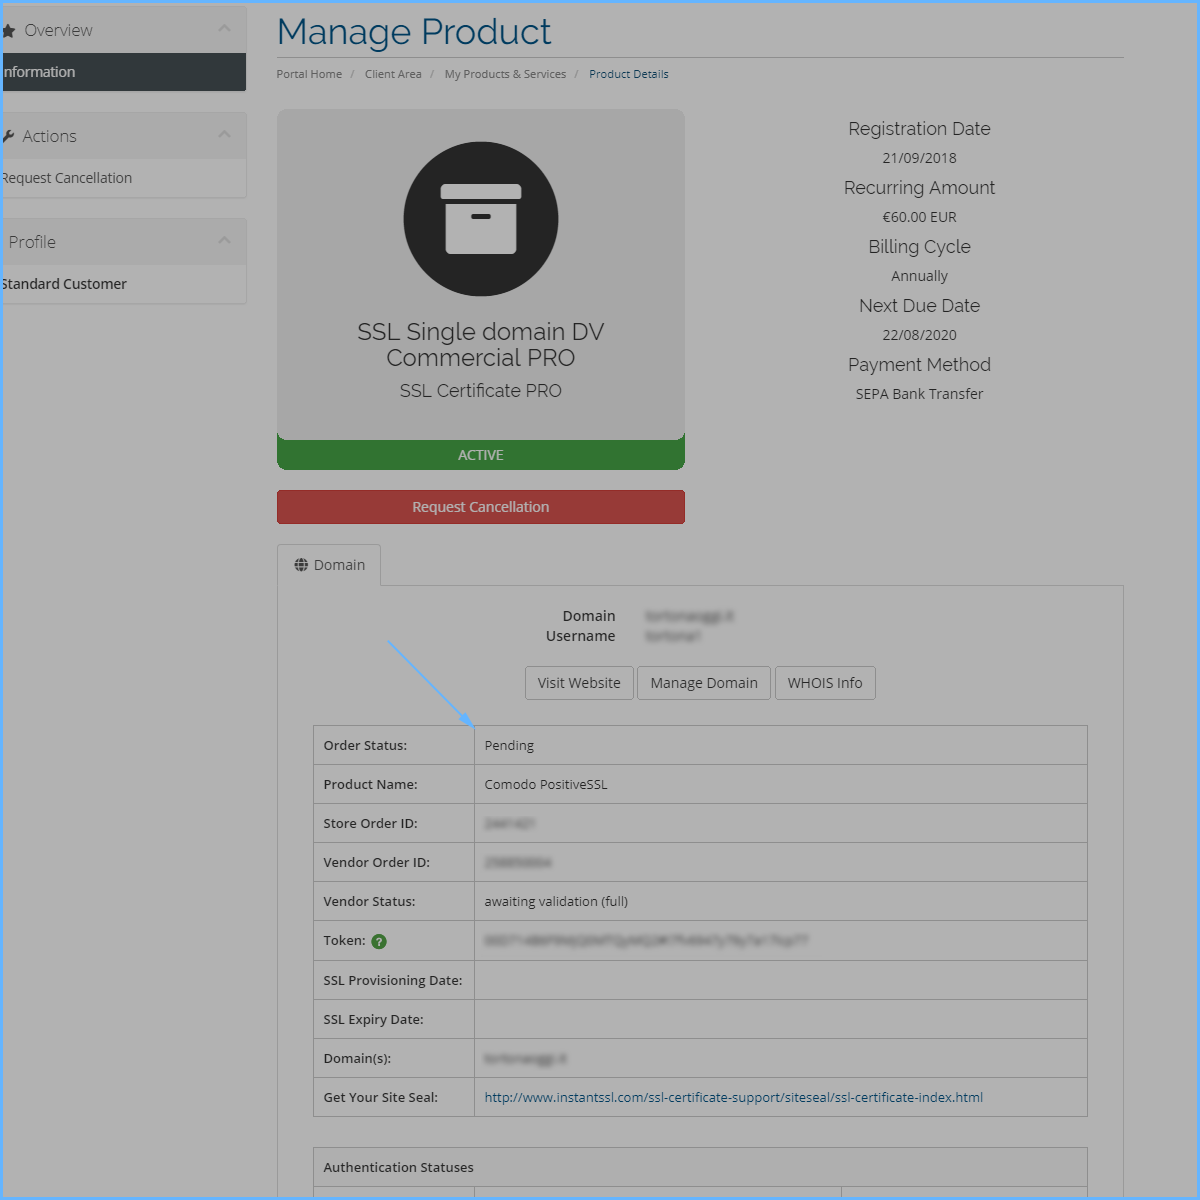
Here the certificate is ready to be re-verified and subsequently installed on your website.
-
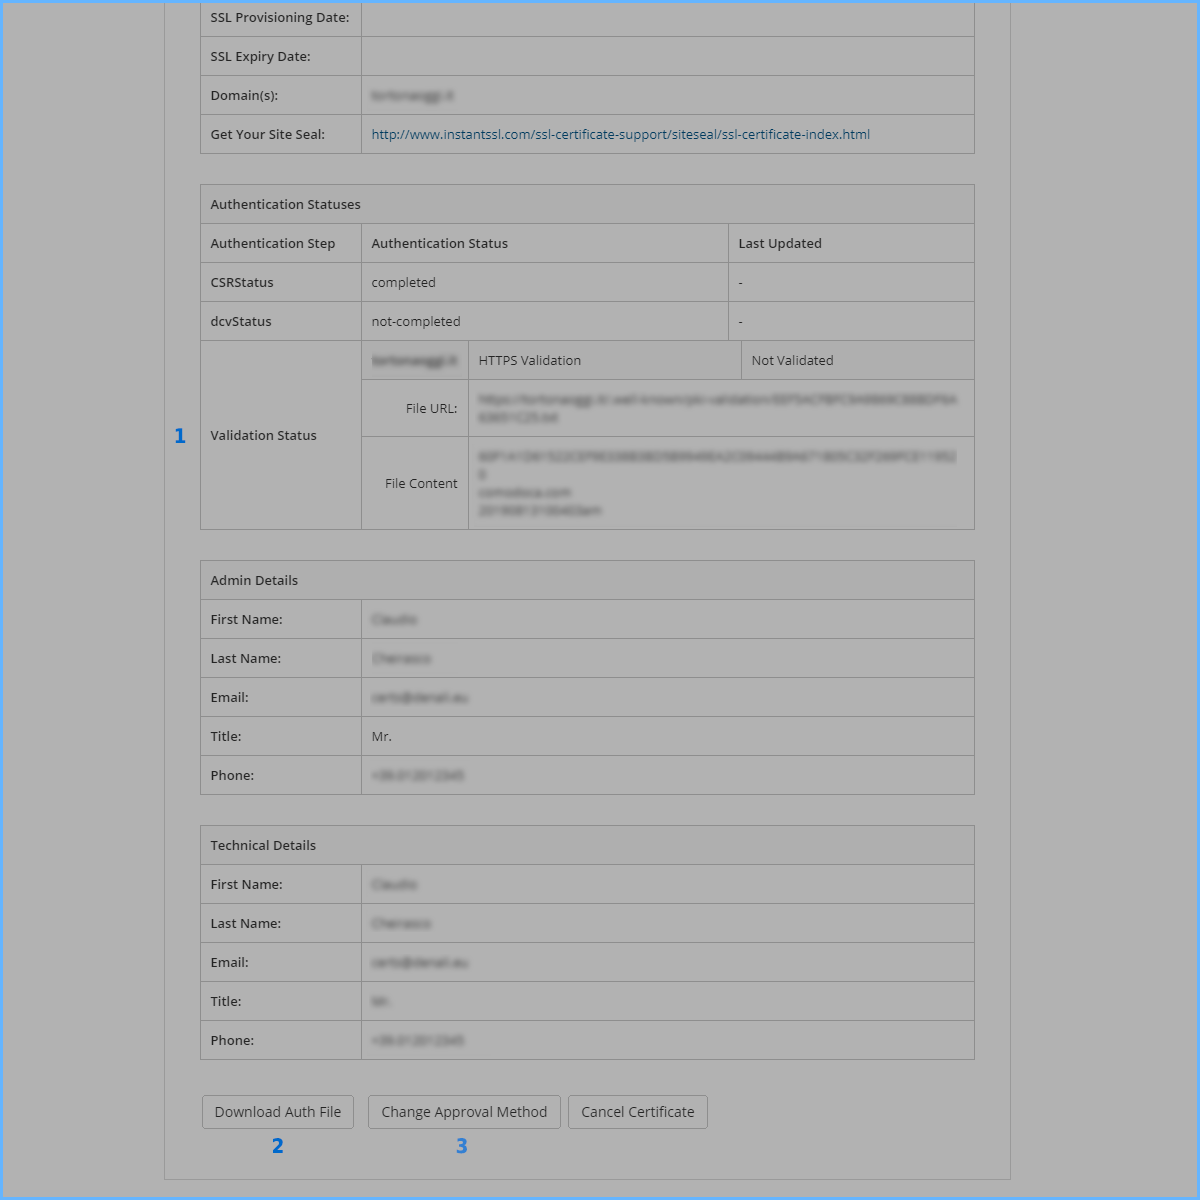
As you can see how to verify the certificate, the one used in the creation phase is maintained (in the case of this example, it checks via HTTP)
-
Therefore download the verification file via the "Download Auth File" button and upload it via FTP to your website in this path:
[ROOT-FTP]/.well-known/pki-validation/
Make sure the file has been uploaded correctly by browsing it with a browser in this path:
http(s)://NOMEDELVOSTRODOMINIO/.well-known/pki-validation/NOMEFILE.txt
If you browse it correctly, all you have to do is wait for the CA to verify the file itself. At that point the SSL certificate will be sent to you via email and will be available for download on the product page within your customer area -
If you wish to change the verification method, you can do so using the "Change Approval Method" button. In addition to verification via HTTP, the following are available: via DNS and via MAIL.
New Certificate Installation on Website
If you have done everything correctly, after a few minutes the CA will have finished verifying your domain. Releasing your new certificate. You can check the status of the verification via the SSL certificate detail page (in your customer area> My Services, click on the certificate you are renewing). If the certificate status changes from Pending to Active it will mean that your certificate will be ready to be downloaded and installed.
The certificate will be sent to you both via e-mail and will be available on this page using the "Download Certificate" button.
Now that you have the new certificate, you can follow the guide How to configure a commercial SSL into your hosting account to finish the installation.
How to verify the ownership of the certificate: HTTP, DNS, MAIL
There are three ways to verify the ownership of the certificate. You can change the verification mode freely using the Change Approval Method button. The following describes how you should proceed depending on the chosen mode.
HTTP mode verification
The verification mode via HTTP has been described in this guide just above. However, we report here the detailed procedure. In summary, this mode consists of downloading a specific file and uploading it via FTP to a specific directory on your website.
- Through your client area on the SSL service page you wish to renew selected as a verification method "HTTP(S)"
- Download the authentication file using the appropriate button "Download Auth File"
- Now connect via FTP to your website and create the following directories: /.well-known/pki-validation/ starting from the main directory of your website
- Now always via FTP take the authentication file downloaded first and upload it to this directory. The result must be to be able to navigate the file with a normal browser to this address: http(s)://NOMEDELVOSTRODOMINIO/.well-known/pki-validation/NOMEFILE.txt
- Now all that remains is to wait for the verification by the CA. When successful, you can log back into your client area, on this SSL certificate page, and download the new certificate from there. Then proceeding with the guide for installing it on your website.
DNS mode verification
The verification method using DNS consists of creating a special CNAME record on the DNS zone of your domain. If you are familiar with the configuration of the DNS zone of your domain. This is definitely the way to go.
- Through your client area on the SSL service page you wish to renew, select as a verification method "DNS"
- View how the DNS record should be structured. The section is the following (example image):
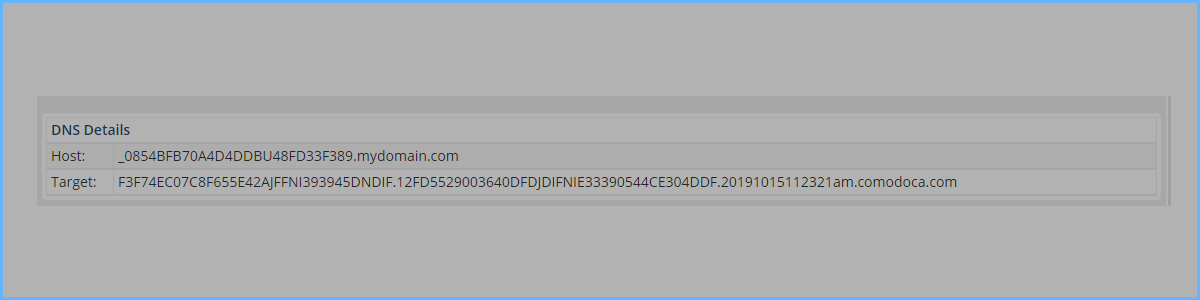
- In this example the CNAME to be created must be as follows (be careful to insert the end point both on the host and on the target):
HOST: _0854BFB70A4D4DDBU48FD33F389.mydomain.com.
TARGET: F3F74EC07C8F655E42AJFFNI393945DNDIF.12FD5529003640DFDJDIFNIE33390544CE304DDF.20191015112321am.comodoca.com. - Now all that remains is to wait for the verification by the CA. When successful, you can log back into your client area, on this SSL certificate page, and download the new certificate from there. Then proceeding with the guide for installing it on your website.
EMAIL mode verification
The last verification method is via email. In summary it is required to define an authoritative mailbox for this particular domain and subsequently the CA will send an email to this box to allow you to verify your contacts.
- Through your client area on the SSL service page you wish to renew, select as a verification method "EMAIL".
- Now select one of the emails that are offered to you. You must ensure that this email exists on the domain and that you have access to that box.
- Generally we recommend creating (or using) the postmaster inbox @ NOMEDOMINIO. Which is the standard one
- After that, click on the send mail button. After a few minutes the CA will send a verification email to this email address (if you do not receive it, check in the Spam folder)
- As soon as you have received this email, you can click on the link in it that allows you to verify the data of this SSL certificate
- Now all that remains is to wait for the verification by the CA. When successful, you can log back into your client area, on this SSL certificate page, and download the new certificate from there. Then proceeding with the guide for installing it on your website.
Conclusions
As you have seen the renewal of the certificate is very simple. It can be summarized as follows:
- execute payment of the renewal invoice (or freely renew the certificate from your customer area)
- complete the verification of the domain through one of the foreseen methods (HTTP, DNS, EMAIL)
- download the new certificate
- install the certificate on your site following the guide How to configure a commercial SSL into your hosting account
We remind you that the our staff remains at your disposal for every need.
