The goal of this guide is to explain to you how to install a commercial SSL certificate within your hosting plan. It is assumed that you have already purchased a commercial SSL certificate. If you have not yet done so, make sure you have read the guide for generating the CSR and that you have purchased your commercial SSL certificate at this link.
How to download your SSL certificate and zip archive contents
Once you have completed the purchase of your commercial SSL certificate, you can get it in two ways.
Through the service control panel
- log into your customer area > Services > My Services
- here you can locate your SSL certificate using the appropriate search function
- once found, click on the domain name of the certificate you will enter the product page
- at the bottom of this page there is the appropriate button to download the certificate

Through the certified approval email
When the certificate is activated, a successful email will be sent to you from the system containing the attached zip with the certificate.
Content of the archive file
Once the zip archive containing the certificate is downloaded and decompressed on your terminal, you will find the following files inside:
DOMAINNAME.crt: This is the real certificate
AddTrustExternalCARoot.crt: This is a secondary certificate related to the CA
AddTrustCA.crt: This is a secondary certificate related to the CA
DomainValidationSecureServerCA.crt: This is a secondary certificate related to the CA
How to install the SSL certificate within your hosting plan
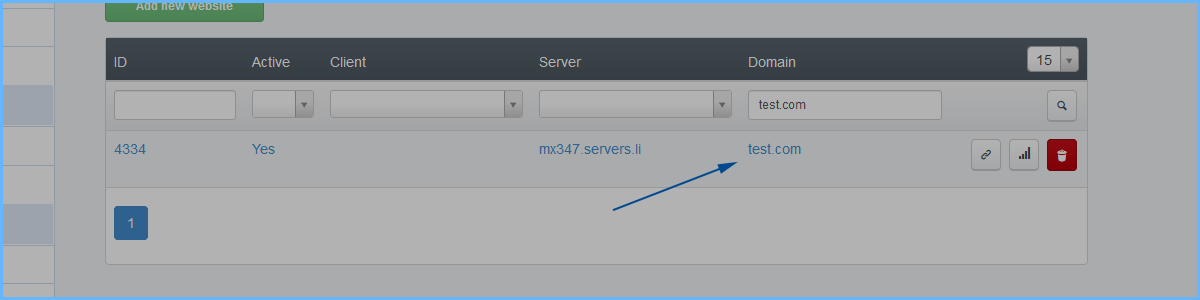
- Log in to the hosting control panel https://servers.li
- Go into Web Sites > Site and click on the site where you want to install the SSL certificate
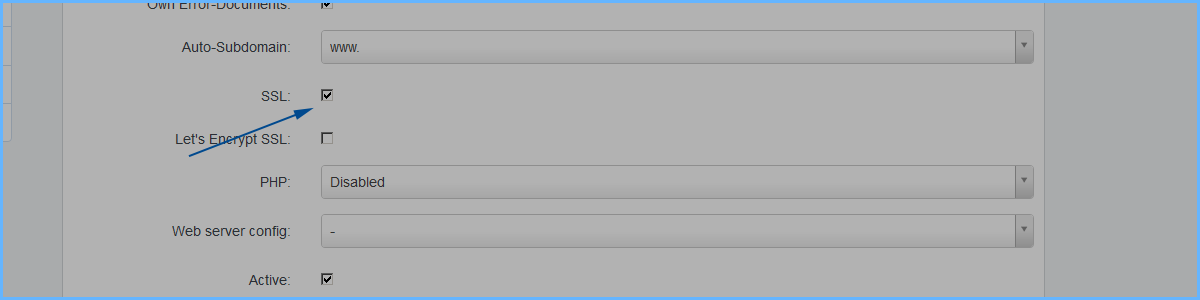
- Make sure that the SSL check box is enabled in your site settings. If not, activate it and save the settings before continuing
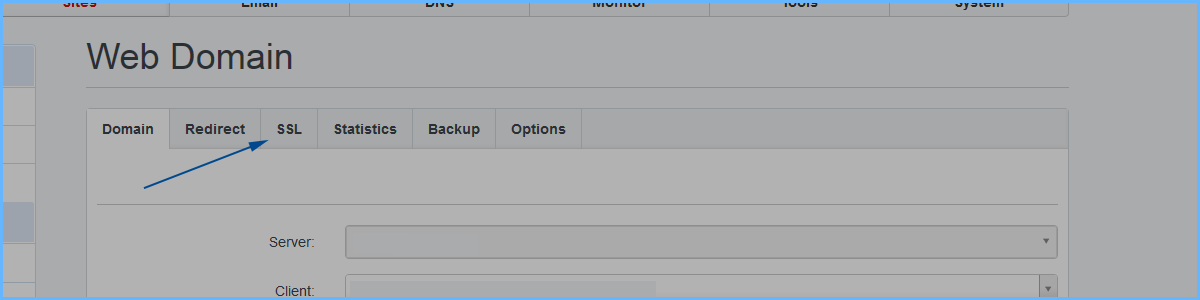
- Now always from the settings screen of your website, click on the SSL tab to access the SSL configuration section of your website
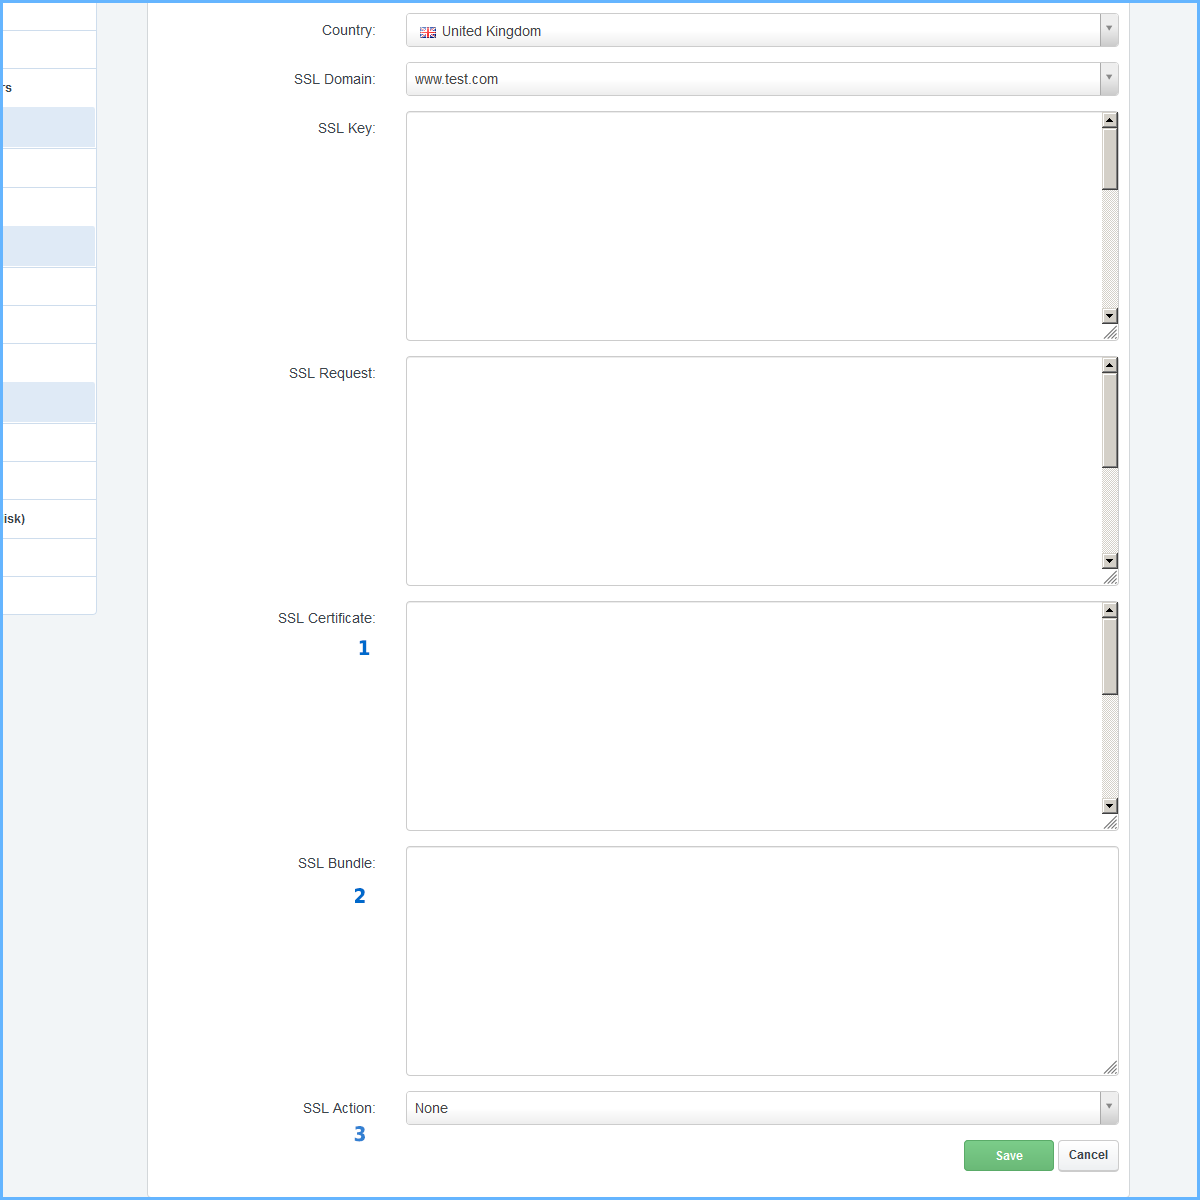
- This is the main screen for SSL configuration. Here you can upload your certificate (it's very easy to copy and paste the contents of 3 text files).
- Open the files in the zip archive described above with a text editor (eg notepad) on your computer (NOMEDOMINIO.crt, AddTrustExternalCARoot.crt, AddTrustCA.crt, DomainValidationSecureServerCA.crt)
- Now copy and paste the contents of the fileNOMEDOMINIO.crt the field SSL Certificate (1). If there is any content in this field, remove it or overwrite it
- Now copy and paste the contents of the other 3 files AddTrustExternalCARoot.crt, AddTrustCA.crt, DomainValidationSecureServerCA.crt one below the other in the field SSL Bundle (2). If there is any content in this field, remove it or overwrite it
- Now from the selectSSL Action, please select Save Certificate and save with Save button
- Procedure complete
Final Note
If you did everything correctly within 5 minutes of completing the operations, your certificate will be operational on your site. You can verify by browsing your site in HTTPS then with https: // NOMEDOMINIO. You can thus warn the webmaster that the SSL certificate is active and operational, and that it can provide for the preparation of your site to respond in https.
We are also available by telephone if you have any concerns about certain passages.
