What it means to configure the boxes on a mail program using SSL
Nowadays it is necessary to use all the services on your hosting (therefore browsing the website, access via FTP and accessing the mailboxes via a mail client) using secure and SSL / TLS encrypted protocols . In this way you will have the certainty of accessing your information in a safe and secure way. In this guide we will explain you where to find the information to configure your inbox securely.
Where to find information
The basic information you need to configure your mailbox is as follows:
Username
This username is equivalent to your mailbox (es. casella@miodominio.com)
Password
It is the password of your mailbox. It's the one you entered when you created the mailbox via the hosting control panel https://servers.li
Servername
For simplicity we use the same server for both incoming mail (POP3S / IMAPS) and outgoing mail (SMTPS). You can find this server name either in the activation mailing of the hosting service that was sent to you, or in your hosting control panel https://servers.li
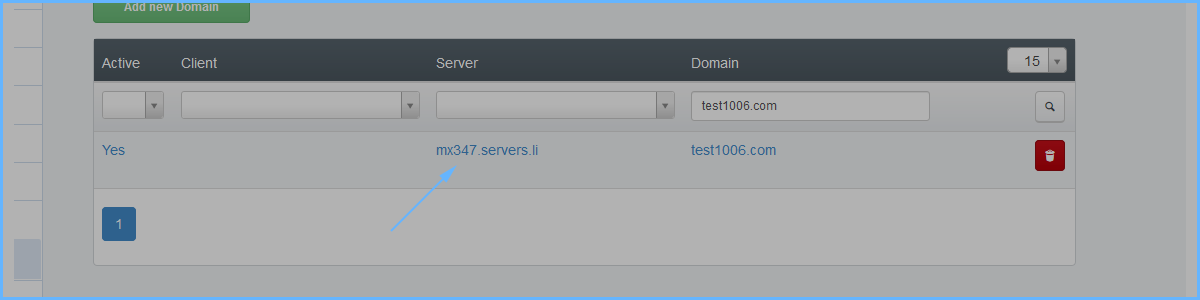
To find the mail server to connect to, via the control panel https://servers.li you can proceed as follows:
- access the https://servers.li panel via your user credentials
- browse the Email section. And in the left menu select Domain
- here look for your domain. The server name to use will be the entry that appears in the Server table entry
In the example below the server name is mx347.servers.li
The ports used by the service
To ensure maximum compatibility with any mail client, we use only standard ports for our services. We report below:
POP3s (Download mail to your terminal): 995
IMAPs (Mail synchronized with the server, recommended over POP3s): 993
SMTPs (Server for sending emails): 465
Authentication required on the SMTPs server
When configuring the SMTPs outgoing mail server, you need to make sure that you set the Server Authentication required, with the same credentials as the outgoing mail.
Final considerations and examples of configurations
The information above is all you need to set up your mailboxes. If you provide this document to a technician, you will surely know how to configure your terminal correctly in a few minutes.
For further configuration simplicity, below are some examples of configuration of some specific mail clients.
Specific configuration examples
The following data will be used for the following examples. You will have to change these data, applying those in your box. Data that you have found as indicated in the previous paragraph.
Data used in the examples (you must replace them with those in your box)
Example mailbox: test@mydomain.com
Sample mailbox password: abc123
Sample mail server (POP3s/IMAPs/SMTPs): mx347.servers.li
Microsoft Live Mail
- Open the software
- Click on Account > Mail Account
- Here fill in the new account with the data in the box as shown below in the figure:
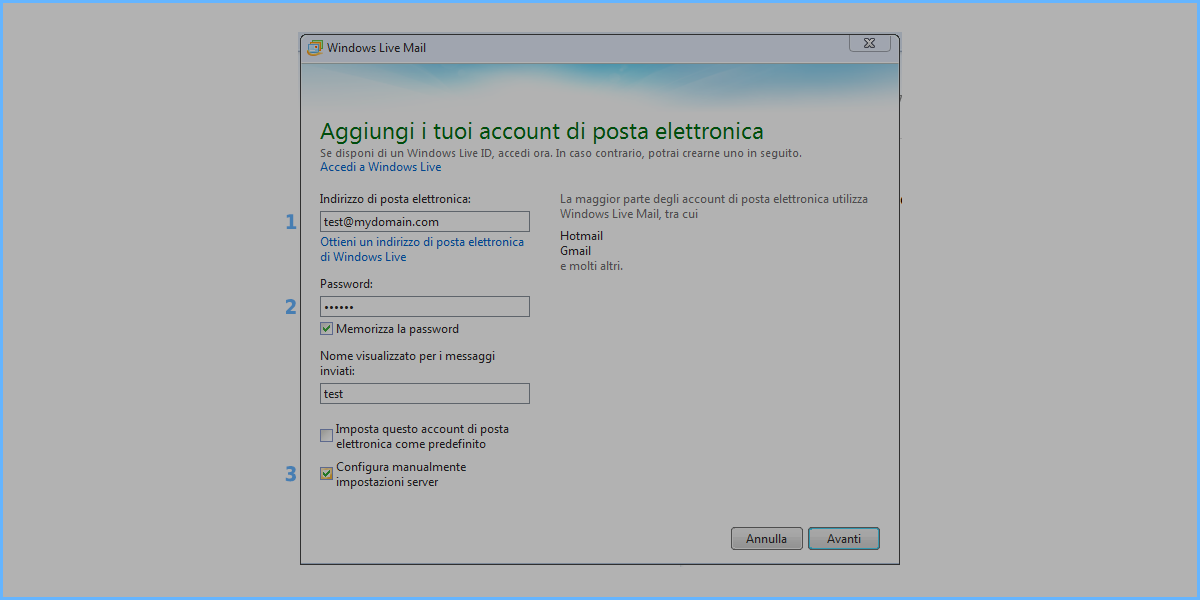
- Fill the mail address test@mydomain.com
- Fill the password of the mail address
- Select "Manually configure server settings"
- On the next screen, fill in the server data:
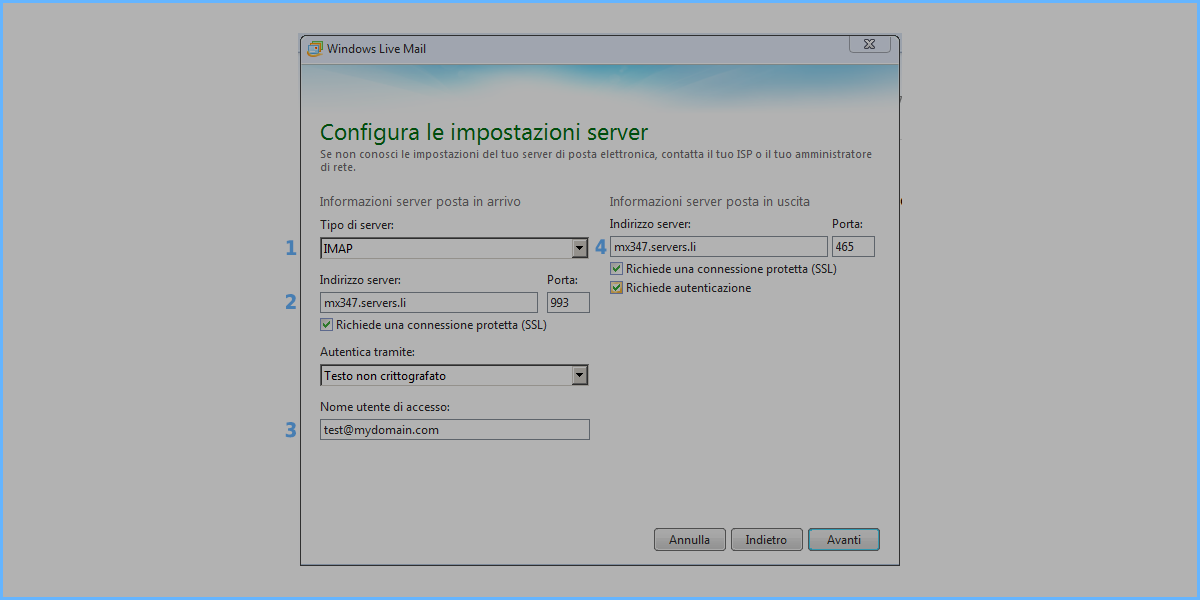
- Specify account type (IMAP is the best option)
- Specify the servername of the incoming mail (in this example is mx347.servers.li) and the port (993). Select to use an SSL connection.
- Specify your Account Name (is equal to the mailbox): test@mydomain.com
- Specify the servername of the outgoing mail (in this example is mx347.servers.li) and the port (465). Select to use an SSL connection.
- Save and press Continue. Now your account is added.
Mozilla Thunderbird
- Open the software
- Click on Tools > Setup Account
- Click on Account Actions> Add Mail Account
- In the next screen set the basic data of the mail account
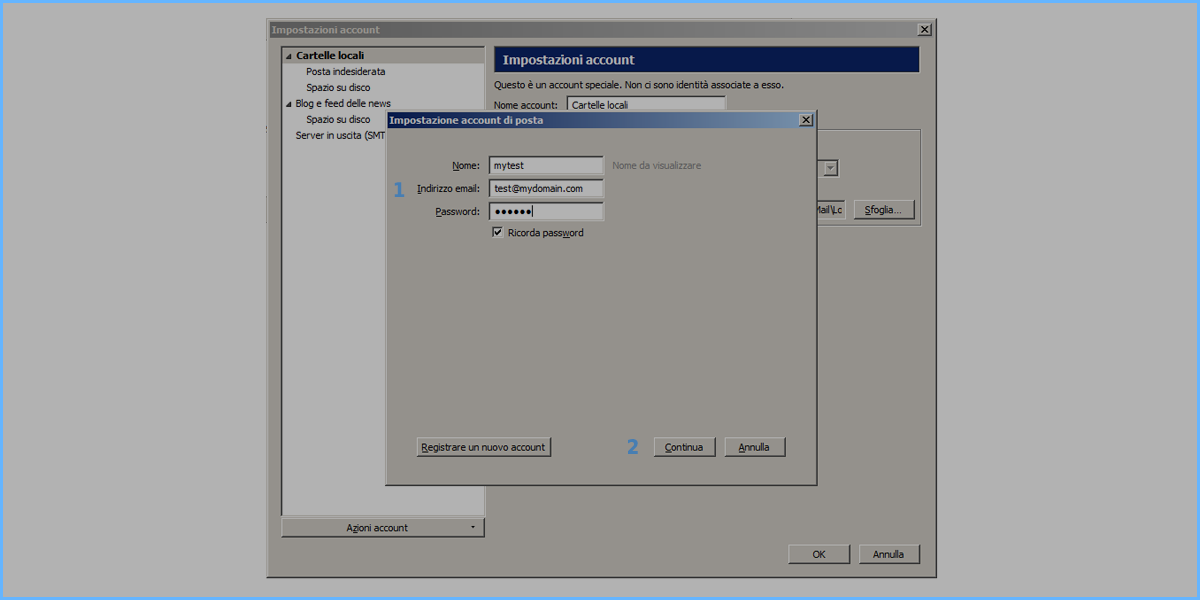
- Enter a Name (freely), the e-mail address (test@mydomain.com in this example) and the password (abc123)
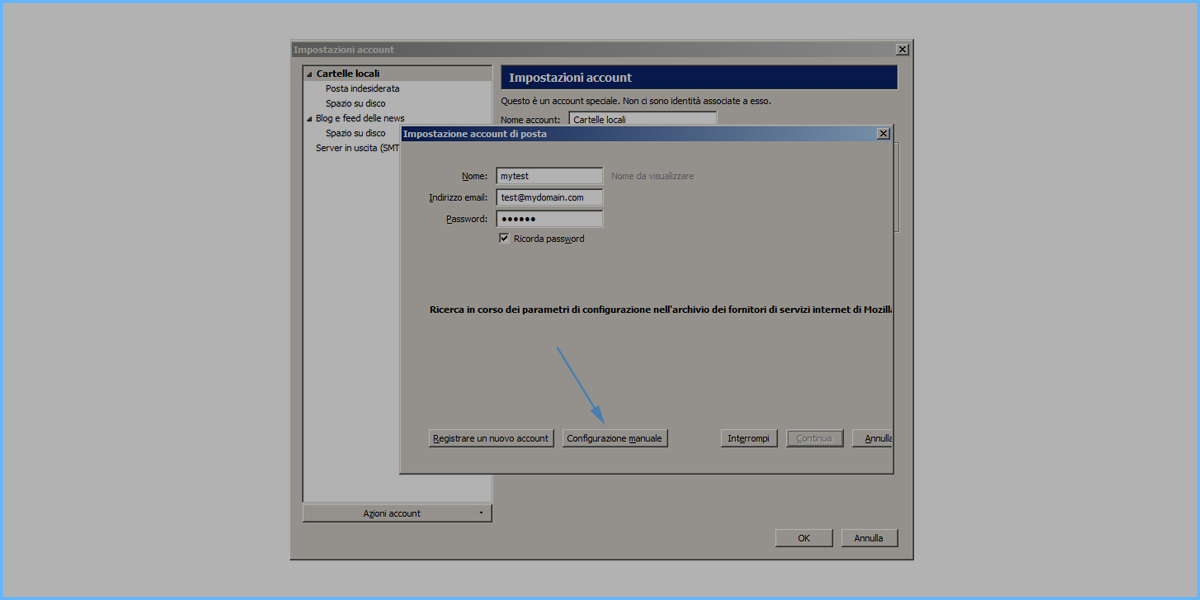
- Press Continue to continue setting up the account
- The program will try to automatically configure the mailbox. Press on Manual Configuration to finish the configuration by hand
- On the next screen you can configure the details of the mail servers
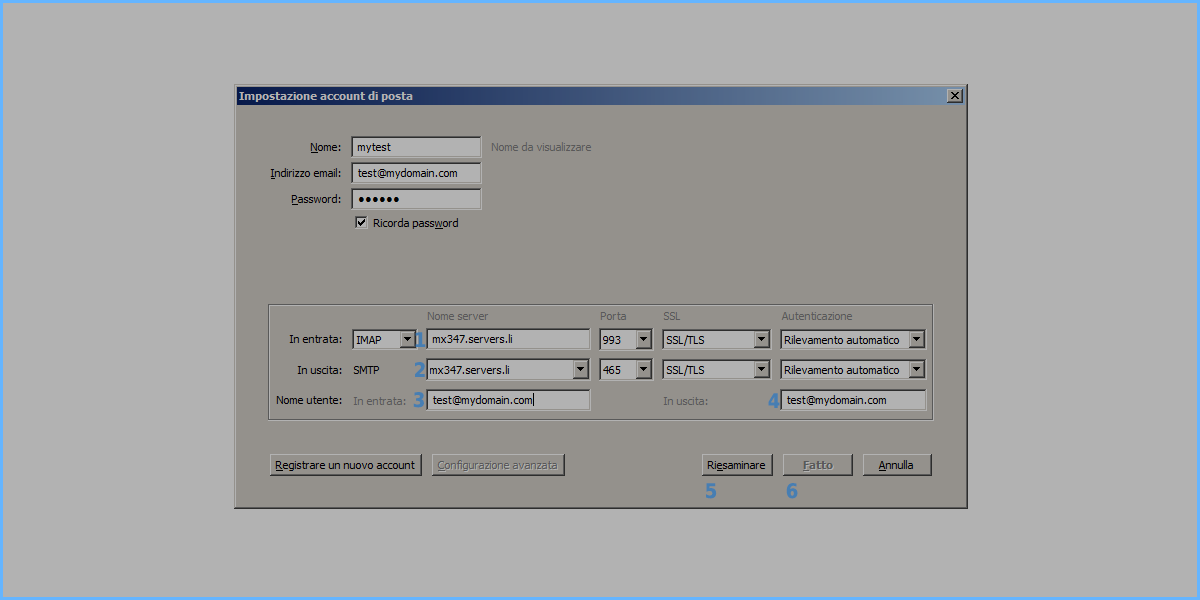
- Enter as IMAPs server (mx347.servers.li in this example), port (993), SSL / TLS and as authentication leave out Relevant automatic
- Enter as server SMTPs (mx347.servers.li in this example), port (465), SSL / TLS and as authentication leave automatic detection
- Specify the mailbox (test@mydomain.com in this example) as the Username for incoming mail
- Specify the mailbox for the outgoing mail user name (test@mydomain.com in this example)
- Then press Review Data
- If all the parameters have been entered correctly, the Done button will be activated, which can be pressed to permanently save the account.
